Insulation Remover

Insulation removal vacuums are specialized machines that use suction to remove insulation from walls, ceilings and floors. The insulated material is then discharged into recovery bags for proper disposal.

Old or damaged insulation can pose a health risk and structural threat for the home. Replacing it with new, fresh insulation will increase indoor air quality and energy efficiency for the home or business. Contact Perth Insulation Remover now!

Insulation is a key component of a building’s structure and indoor environment. It protects against extreme temperatures, reduces energy costs, and eliminates noise. However, the effectiveness of insulation can be compromised by a variety of issues, including damage and mold. Mold growth in insulation can cause severe damage to a building’s structure, create musty odors, and lower a home’s energy efficiency. Addressing moisture and water problems, improving ventilation and air circulation, regular inspection, and removing and replacing damaged insulation can prevent mold growth.

Insulation and drywall are often the first things to show signs of mold, with stains, discoloration, or musty odors. Moldy insulation is also a health hazard, posing respiratory and allergic symptoms in residents. It can release mycotoxins into the air that cause harmful side effects and allergic reactions. Moldy insulation must be removed and replaced by a professional in order to eliminate mold spores from the air.

The type of insulation a homeowner chooses to install in their home is important for mold prevention. Insulation made from fiberglass, cellulose, and recycled newspaper is generally resistant to mold growth. However, it is still possible for mold to grow in the attic or crawl space due to leaks, condensation, and other factors.

If the mold is limited to the surface of the insulation, it may be able to be cleaned with household cleaners. However, it is essential to wear a N95 or P100 respirator mask, gloves, and protective eyewear when attempting to clean moldy insulation. If the mold is penetrating deep into the fiberglass batts, cellulose, or blown-in insulation, it will likely need to be completely removed and replaced.

Moldy insulation is a significant health and safety risk for homeowners, so it must be removed quickly to avoid exposure and other adverse effects. In addition, it can dramatically decrease the insulation’s ability to keep a home comfortable, driving up energy costs. To learn more about how mold can impact your home’s insulation, contact Indiana Mold Remediation. We can answer your questions and provide a free mold inspection of your home or business.
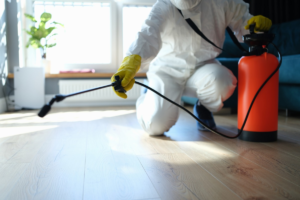
Pest Infestation

Whether pests are entering a building to feed or shelter, their presence presents both health and safety risks for people who work in the space. They carry bacteria in their fur, droppings, saliva and feet that can lead to negative health implications such as illness and even death. Detecting pests early and eliminating them quickly can prevent this from occurring.

Signs of a pest infestation include gnaw marks, scurrying sounds or the smell of rotting food. Other signs to look for include insect or rodent droppings and a buildup of dirt or sawdust where pests have been burrowing or nesting. A sudden increase in the number of pests in an area or a noticeable loss in overall building cleanliness are also good indicators of pest problems.

In addition to visual evidence, pest infestations can be detected through auditory cues, such as scratching and scurrying noises, especially at night. These signs indicate that pests are hiding in the walls or attic, and are likely breeding or feeding in those locations.

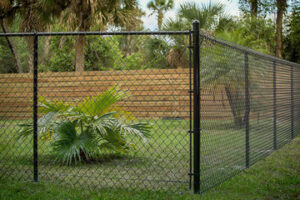
Regular inspections of a building can identify the most common entry points for pests and help prevent them from infesting. These include cracks, crevices and gaps that are large enough for pests such as mice, cockroaches, ants or rats to slip through. These areas should be sealed with caulk or weatherstripping. Additionally, it is important to keep garbage and other materials contained in properly-sealed containers.

It is also important to regularly inspect the outdoor areas of a property for signs of pest infestation, such as ant hills or termite mud tubes. It is also crucial to trim back bushes and clear away debris from the property.

It is a good idea to schedule regular pest prevention services with a reputable pest control company. These services can help to reduce the risk of infestation by providing a professional evaluation and implementing both chemical and non-chemical preventive methods to stop pests from infesting buildings. These services can be as simple as examining the premises for cracks, gaps and other potential entry points and as complex as a comprehensive integrated pest management program.

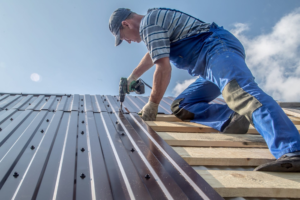
Poor Energy Efficiency

Over time, insulation loses its ability to resist the flow of heat or cold, resulting in high energy bills and a less comfortable home. Replacing outdated insulation with new materials is a cost-effective home improvement that can lead to reduced heating and cooling costs. It is often part of a larger remodeling project that may require access to walls or attics.

One of the best ways to ensure your existing insulation is effective is to replace caulk and weather stripping every two years, which helps prevent air leaks and reduces drafts. It is also a good idea to inspect your attic for signs of insulation damage or wear and tear, which can lead to poor air quality, health issues, and higher energy bills. Adding new insulation can be a large job, and hiring a professional company to remove the old insulation and replace it with the right materials is a smart move that will protect your home from mold, pest infestation, and other concerns while ensuring its overall efficiency.

If the existing insulation is infested with pests or contaminated by rodent feces, it is often necessary to remove it. In addition, the presence of asbestos could make removal more difficult and dangerous. However, the signs of poor energy efficiency and higher than normal energy bills are clear indicators that it’s time to remove the old insulation and upgrade to a more efficient option.

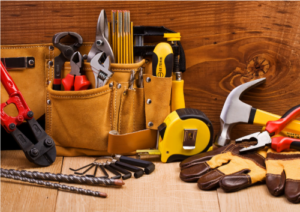
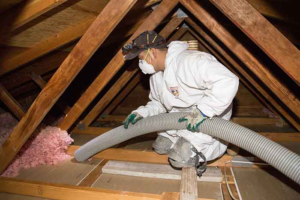
During the process of insulation removal, it is important to be aware of the possible hazards that can occur, including the need for proper safety gear. Gloves are a must to protect hands from sharp objects and pests, and eye protection is advisable to avoid irritation from dust or other particles. It is also a good idea to cover surfaces that will not be exposed to the insulation material, such as floors or furniture.

After removing the old insulation, it must be properly disposed of. This can be done by contacting waste management or recycling services. The type of insulation and local disposal regulations can affect the costs associated with disposing of the old material.

Remodeling Projects

When renovating or repairing the home, it’s an ideal time to upgrade and add new insulation for better energy efficiency and comfort. Insulation damage from pest infestations, water leaks, and outdated materials necessitates replacement. This type of remodeling also requires a careful inspection to check for existing problems, including water damage and structural integrity.

When it comes to insulation, there are several options available for homeowners that include spray foam, cellulose, and rockwool. The type of material chosen will determine the appropriate tools and methods for removal. The type of home also impacts the cost as larger homes will require more labor and materials, resulting in higher costs. Finally, accessibility to attics or crawl spaces can play a role in the cost of removal and installation as access may need to be modified.

During the removal process, it’s important to work in a well-ventilated area to reduce exposure to dust and other particles that can affect respiratory health. Using plastic sheeting or tarps to seal off areas of the home will help contain any dust or debris and prevent it from spreading elsewhere. Wearing a mask or respirator and covering up skin with long-sleeved clothes will also help protect against irritation. Lastly, using a vacuum with a HEPA filter for cleaning can minimize dust and airborne particles.

Once the old insulation has been removed, it’s vital to dispose of it properly. Consult your local waste management facility for proper disposal guidelines. Some types of insulation require special handling and disposal procedures, while others can be thrown in with normal trash. The amount of insulation removed will also impact the overall cost as some require a large dumpster for collection and others need to be separated out for recycling.

While it’s possible to remove your own insulation, it is often recommended that you hire a professional insulation contractor. These professionals have the expertise and equipment needed to handle the job safely, efficiently, and correctly. Their experience with a variety of insulation types and installations will allow them to identify the best solution for your home.

Advantages of Metal Roofing

Metal Roofing Columbus GA can offer superior protection for homes and buildings. It withstands extreme heat, storms and even provides extra protection in wildfire areas.

The material starts as coils which are processed (slit, cut-to-length, rolled into panels) for installation. The panels are usually fastened to the roof deck with exposed fastener systems.

Metal roofing is an attractive, durable option for homeowners and builders seeking a high-performance roof system. It is impervious to rot, insect damage, and other problems associated with traditional shingles. In addition, it is easy to maintain and can add to a property’s value.

As with any home improvement project, a customer’s decision to invest in a new metal roof will depend on several factors. These include upkeep requirements, aesthetics, and climate suitability. Fortunately, the wide range of metal roofing options available ensures that there is an ideal product for every location and architectural style.

The durability of metal roofing can be attributed to its structural design and the materials used for manufacturing. Galvalume steel, for example, is a common choice because it is an affordable and corrosion-resistant material. This is especially important for regions that experience frequent temperature changes and high levels of salt in the air.

Another factor to consider is the thickness of the metal panels. In general, thicker panels are more durable than thinner ones. Additionally, the type of fastener and sealant used can also affect durability. For these reasons, it is important to work with a professional that can provide detailed specifications and recommendations.

While most metal roofs are very durable, they can still face issues like leaks and thermal expansion and contraction. These issues can be minimized by working with reputable contractors, conducting regular inspections, performing routine maintenance, and using energy-efficient solutions.

Aesthetics can also be a concern for some buyers. However, most metal roofing systems are designed to complement the architecture of the building and can be customized to blend in with a particular look. Furthermore, a variety of color and finish options are available to complement any aesthetic vision.

Aesthetics

A metal roof adds a sleek, refined aesthetic to a building that elevates its visual appeal. A metal roof can complement various architectural styles, from modern to traditional, while delivering sustainability and durability benefits. At 4Ever Metal Roofing, we are at the forefront of delivering exceptional metal roofing services, and our experts work closely with homeowners and architects to create a personalized roof that perfectly reflects their vision for their home or commercial property.

One of the most remarkable aspects of metal roofing is the extensive range of color options, from earth tones that accentuate the natural environment to vibrant shades that elevate the home’s personality and create a bold statement. This allows homeowners to easily match their new metal roof with their existing siding, trim, and surrounding landscapes. Additionally, metal roofs are known for their durability and longevity, so they will maintain their visual appearance for decades to come.

When deciding on a roof color, there are several factors to consider, including the architectural style of the house and the local climate, as well as energy efficiency goals. Lighter colors reflect more sunlight, potentially reducing cooling costs in warmer regions, and darker colors absorb more heat, which can be beneficial for homes in colder climates. Additionally, some regions have neighborhood and homeowner association guidelines that may influence the color choice.

In addition to the color options, metal roofs also offer a variety of different profiles and finishes. Those seeking a more refined look can choose standing seam metal roofing, which is constructed with panels that interlock to form a seamless and monolithic surface. Alternatively, those who prefer a more traditional look can opt for metal shingles that are manufactured to resemble wood shakes, slate, or clay tiles.

Beyond the standard colors and profile options, homeowners can personalize their metal roofs even further by selecting an innovative design pattern or unique metal cut. For example, corrugated metal can be shaped to create an organic silhouette that mimics the look of grass, while standing seam panels can be curved or angled to evoke a more sophisticated aesthetic.

Energy Efficiency

The energy efficiency of metal roofing has become a major selling point for home buyers who are looking to save on energy costs. Unlike asphalt shingle roofs, which absorb solar heat and then radiate it back into the home, metal roofs are highly reflective and help homeowners cut down on cooling costs in summer.

The atomic structure of metals gives them a high rating for thermal emittance, which means they can easily release the heat energy that is stored in them. This quality also enables them to reflect up to 70% of the sun’s rays, which helps keep homes cool and reduce the amount of money they spend on air conditioning.

In addition to energy efficiency, metal roofs are made of clean materials that can be recycled at the end of their lifespan, making them a green alternative to traditional asphalt shingles. Additionally, they are more durable than shingle roofs and require fewer maintenance services to stay in good shape.

A metal roof’s ability to reflect sunlight can be improved by adding reflective coatings, which can help boost the energy efficiency of a home by up to 30 percent. Cool roof technology is also available to help enhance a metal roof’s energy efficiency even further.

Besides reflecting sunlight, metal roofs are fire-resistant and can protect a house from damage caused by debris and other sources of external heat. As such, they can help prevent the need for expensive repairs and increase a home’s resale value.

Many people mistakenly think that metal roofing is only used on large industrial or commercial structures, but it’s becoming more popular for residential buildings as well. The fact that it is available in a variety of colors and styles means that homeowners can find the perfect design to suit their aesthetics.

If you’re thinking about putting a metal roof on your property, contact us at Excel Construction Group to learn more about the benefits of this roofing material. We offer free roof inspections to assess your roofing needs and can advise you on the best type of metal roof for your home.

Warranty

Many homeowners and building owners are on the fence about making the switch from shingle to metal roofing. They are concerned about the maintenance required, but they are willing to make the investment if they will have the peace of mind that comes with a lifetime warranty.

Educating your customers about the different types of metal roofing and the warranties that are offered can help them decide to move forward with their project. Warranties are important for many reasons, especially when it comes to a major purchase like a roof or wall system. The right warranty can add value to a home or building and increase its resale potential.

There are a few different types of metal roof and wall warranties available, including weathertight warranties that cover leaks and paint warranties that cover certain levels of degradation of the coating on top of substrates like galvanized, aluminum or Galvalume steel. Knowing what each type of warranty offers can help your clients select the right product for their architectural projects.

Weathertight warranties are designed to cover repairs that occur due to a variety of reasons, such as damage from hail or wind, and they may also include some limitations on ice dams and corrosion. The length of time that a weathertight warranty covers repairs for is generally based on the initial cost of the product, with longer warranties providing more coverage.

Another type of metal roof and wall warranty is a fade or chalking warranty. This warranty protects the paint from fading or chalking and may or may not cover the entire roof or wall system. Fade and chalking are determined by how much a color degrades from its original appearance and is based on specific criteria that is outlined in each manufacturer’s warranty.

Metal roofing is a durable and attractive option for many types of buildings and homes. When properly installed, it can last for decades and add significant value to a property. A metal roof can also help to reduce energy costs and provide protection for those within the structure. The right metal roofing will offer a high level of satisfaction, and the warranty that is provided can help ease any concerns.

Advantages of Stamped Concrete

Stamped Concrete Dallas is a versatile and cost-effective alternative to other materials that can add character to your home’s exterior. It can be used for a variety of projects, including patios, walkways, driveways, and pool decks.

Stamped Concrete

The key to successful stamped concrete is proper base preparation, a well-trained contractor, and regular maintenance. This includes sealing and repairing to address cracks and color fading.

The versatility of stamped concrete makes it a popular choice for homeowners looking to upgrade their outdoor space. It can be used for driveways, walkways, patios, pool decks, and more. Its design options, cost-effectiveness, and durability make it a great choice for any project. Furthermore, it can enhance a home’s curb appeal and increase its value.

Traditional concrete is made up of cement, water, and aggregates like sand or gravel. It’s poured into desired areas or molds and allowed to cure. Unlike stamped concrete, which is customized after pouring, traditional concrete is limited in its design flexibility.

Stamped concrete is a popular alternative to paving materials like brick, pavers, and stone because it’s more affordable and durable. It also requires less maintenance than other paving materials, such as resealing and grouting. Furthermore, it can withstand heavy foot traffic and vehicular loads. With proper installation and maintenance, stamped concrete can last for decades.

With its wide range of colors and patterns, stamped concrete can mimic the look of pricier materials such as brick, slate, or stone at a fraction of the cost. It’s also extremely versatile, allowing homeowners to create a unique outdoor space that reflects their personal style and taste.

Another benefit of stamped concrete is its ability to add texture. This is especially useful in areas that require high levels of traction, such as around pools or on garden paths. The texture created by stamped concrete also helps to reduce the risk of slips and falls, making it safer for people to walk on in wet or slippery conditions.

Another advantage of stamped concrete is that it’s easier to install than other paving materials such as clay brick or pavers. This is because it doesn’t require any mortar between each tile, and it can be laid in a single layer. In addition, it can be installed over existing paved surfaces, which saves time and money. However, it’s important to note that stamped concrete is not as porous as paving materials such as clay brick, so it’s more susceptible to frost heave and other changes in the subsurface.

Durability

Whether used for driveways, walkways, or patios, stamped concrete is a versatile and durable material. It is an excellent alternative to pavers, cobblestones, or bricks that can be expensive and difficult to maintain. In addition to being cost-effective, it offers the flexibility of design options not available with other materials. For example, you can choose from a variety of patterns and textures to create the look of natural stone, slate, or wood. You can even use color, either in the mix or applied during the stamping process, to achieve a more authentic look.

A properly installed and maintained stamped concrete surface will last for decades without significant damage or wear. However, it is important to understand that textured concrete can crack like any other type of concrete. This is a result of freeze-thaw cycles and movement in the soil underneath. It is also important to keep in mind that stamped concrete must be sealed to protect it from the elements and to preserve its appearance.

If you’re considering this option, it’s important to hire a professional for the installation. A skilled and experienced contractor will be able to provide you with the best results. They will know how to properly prepare the slab and install it on a level surface. They will also be able to prevent cracks by using proper techniques during the curing process.

Another thing to keep in mind is that if you’re going to use an integral color, it’s best to add it during the mixing process. This will help ensure a uniform color throughout the slab. It’s also a good idea to use a release agent, such as a dry powder or a liquid, to help prevent the stamp from sticking to the concrete. A professional will be able to recommend the best release agent for your project.

While stamped concrete is durable, it is not impervious to damage. It is important to maintain it by resealing it every few years. In addition, it’s a good idea to clean the concrete regularly with a pressure washer and remove any debris that could cause cracking.

Aesthetics

Concrete can take on a variety of different textures, finishes and colors. This makes it a versatile and durable choice for both indoor and outdoor floors. A professional contractor can create a custom look with stamped concrete that complements the style of your home or business. You can choose from a wide range of designs, including herringbone patterns, hexagonal shapes, and brick-style squares. You can even stamp the concrete with a family crest or medallion to personalize your project.

The main purpose of decorative stamped concrete is to enhance the aesthetics of existing structures, such as driveways and patios. It can also be used for garden pathways and decorative outdoor trails. Decorative concrete can be colored and stamped to mimic the look of slate, flagstone, brick, and wood. It can be stained or color hardened to achieve the desired finish.

Before you start stamping, test the concrete surface to see if it is plastic enough for the imprinting process. A good way to do this is to press your finger into the surface at several points. If the concrete yields to your touch, it is ready for stamping.

If you’re planning on using a powdered release for your stamped concrete, it is recommended that you precondition the stamps with some of it. This will provide additional bond breaking and help ensure a clean imprint. In addition, a liquid antiquing release can be mixed into the powdered release to add subtle accents to the concrete surface.

Once you’ve finished stamping, you should seal the concrete to prevent stains and keep it looking fresh. A high-quality sealer will reduce the chances of surface discoloration and block stain penetration from chemicals, dirt, leaves, and more.

In addition to sealing, regular maintenance and cleaning is important for your stamped concrete. Scrubbing and rinsing the surface will help to remove any stains and maintain its appearance. It is also important to clean the concrete before it’s sealed, as this will ensure a smooth, even finish. In the long run, this will save you time and money on expensive repairs and replacements.

Cost

There are many factors that influence the cost of stamped concrete, including the type of design you choose, the size of your project, and the contractor’s price. To help you budget for your project, work with a company that offers free estimates and consultations. You can also save money by choosing a simple pattern with a single color. Also, try to get the project done during an off-peak period when contractors are more likely to offer discounts.

In addition to the cost of the materials, you’ll also need to factor in the cost of labor to install the stamped concrete. It’s important to hire a qualified contractor to ensure that the job is completed correctly and safely. In some cases, you may need to add additional reinforcement to the concrete to increase its strength and durability.

Stamped concrete can be used in a variety of applications, from patios to driveways. Its natural look and low maintenance costs make it a popular choice for homeowners and businesses alike. It’s also a great option for those looking to reduce their environmental impact. Unlike natural stone or wood, stamped concrete doesn’t require heavy transportation and doesn’t need to be harvested from forests.

When installing stamped concrete, it’s important to choose the right subgrade soils. The best soils are those that are well-draining and loose. They’ll hold the concrete better and keep it from shifting or cracking. On the other hand, clay soils are not a good choice because they tend to hold moisture and can cause the concrete to crack or shift over time.

Before starting the stamping process, the concrete must be hardened. This can be accomplished by using a chemical release agent or a powdered retarder. A release agent is used to prevent the concrete from sticking to the stamps and it’s available in both liquid and powder form.

Once the concrete is ready, it’s time to start stamping. It’s important to stamp the concrete in a sequential order. If you don’t, the pattern will look uneven and won’t be as effective. After the stamping process, it’s important to let the concrete cure. This will help it become denser and less permeable, which will increase its durability.

How to Choose a Fence Company

Choosing the right Fence Company Charlotte NC is crucial to the success of your fencing project. Asking the right questions can help you choose a contractor who is reliable, professional and committed to quality work.

Fence Company

Commercial fencing is an effective deterrent to property and violent crime, helping you save money on security costs. Additionally, it defines property boundaries and prevents disputes between tenants.

A good fence is more than just a way to mark boundaries. It can elevate the ambiance of your outdoor space and reflect your unique aesthetics. At Front Range Fence, we’re committed to helping you design a fence that meets both your aesthetic and functional needs. Whether you prefer the natural beauty of wood, the low maintenance of vinyl or the classic timeless style of metal, we’ll help you find a fence that complements your property and reflects your personal taste.

Color is a key element in determining your fence’s aesthetic. Choose a color that coordinates with your home’s trim or siding for a cohesive look. Neutral tones provide versatility and blend seamlessly with surrounding greenery, while bold colors offer visual contrast. Decorative elements like latticework, finials, and railings can add a touch of elegance. You can also enhance your fence’s visual appeal with natural finishes like stains and paints that highlight the grain of the wood.

Choosing the right height for your fence is also important. Taller fences provide more privacy, but it’s important to consider local regulations and neighborhood aesthetics. Consider a fence height that provides the privacy you desire without interfering with your neighbor’s views or blocking sunlight.

A well-maintained fence increases the curb appeal of your property and may increase its resale value. It will also signal to potential buyers that the yard has been cared for, which can instill confidence in their purchasing decision.

For a more functional, visually appealing option, consider adding climbing vines to your fence. Climbing vines like clematis, wisteria, and honeysuckle can create a lush green wall that adds beauty and privacy. They can also serve as a natural sound barrier, absorbing noise and reflecting it back into the background.

Security

When looking for a fence company, the security of your home should be top of mind. Fences help to deter intruders by clearly demarcating boundaries and making it harder for them to breach. A well-constructed fence can also be fitted with alarms and other security features that send a clear message to would-be intruders that your property is not an easy target. A reputable company will provide warranties on their products and services, and have dedicated customer support to answer questions or concerns.

One of the most important things to look for in a fence contractor is experience. A contractor with years of experience working on fences will be able to give you advice and recommendations that are specific to your situation. This can save you time, money, and hassle down the road.

Another thing to consider is whether or not the contractor has proper insurance. This is a must-have, as even the most experienced contractors can have accidents on the job. Having proper insurance coverage ensures that you won’t be held liable for any medical care needs should an accident occur during the installation process.

In addition to the physical barrier, a fence can be installed with sound-absorbing materials that reduce noise from cars and neighbors. This can make your home a more peaceful place to live and allow you to relax after a long day.

A fence is an investment for your home, so you want to ensure that the job is done right. It’s a good idea to ask for referrals from other homeowners and check online reviews to get a sense of what others have experienced with the contractor.

The importance of security for a home is increasingly important. A well-constructed fence can deter intruders, protect animals and children, and create a safe space for families to enjoy their own personal sanctuary. Contact a local fence company today to find out how they can supply you with exterior protection for your home. They can offer a variety of options, including vinyl, wood, and ornamental iron fencing, to meet your security and aesthetic preferences.

Noise Insulation

You may have spent a significant amount of time and money creating a garden or other outdoor space to relax in, but if you’re constantly bombarded with noise pollution from traffic, passersby, or neighbors in their gardens, you won’t be able to enjoy the tranquility you’re seeking. Noise pollution is not only annoying but also detrimental to health, and it can increase stress levels and lead to a host of physical problems.

The good news is that you can create a more serene garden environment by installing a soundproof fence. A soundproof fence is made of dense materials that block noise waves from passing through and reduce their intensity, and it’s important to choose the right material and location for maximum effect. Ideally, the fence should be placed as close as possible to the source of the noise and positioned so that it blocks the line of sight. Increasing the height of the fence is also important, as each additional foot above the line of sight can achieve an extra 0.5 dB of noise reduction.

To achieve the best results from your noise-reducing fence, you should choose a solid material like wood or vinyl, and ensure that it is properly installed. It’s important to ensure there are no gaps or cracks, as these can allow sound to leak through the fence and into your garden. To enhance the noise-blocking properties of your fence, you can also use acoustic foam or fiberglass insulation. MLV, or mass-loaded vinyl, is particularly effective at blocking sound and can be easily applied to existing fences using staples and glue. Make sure that any gaps or cracks are filled with caulk to prevent any leakage and ensure that the barrier is as thick as possible.

In addition to soundproofing your fence, you can also reduce noise in your garden by adding landscaping elements and implementing other methods of noise reduction. For example, a water feature can be used to mask street noise with the soothing sounds of running water, and white noise machines can be an effective way to block out unwanted distractions.

Durability

The longevity of your fence impacts its functionality, security, and appearance. Choosing the right materials and working with an experienced fence company can ensure your investment is long-lasting, and provides value for your property.

Durability is a multifaceted consideration that is influenced by environmental conditions, material choices, installation techniques, and maintenance practices. Whether you prefer the timeless allure of wood, the modern allure of vinyl, the robust strength of metal, or innovation of composite materials, selecting durable products can help reduce repairs and replacement costs over time.

Weather conditions significantly impact fence durability, with factors such as humidity and temperature fluctuations influencing the stability of your fencing. Selecting durable materials that can withstand the challenges of your climate will allow you to enjoy your fencing for longer and with minimal upkeep.

It is also essential to consider your property boundaries when selecting a fence. A property survey can confirm the exact boundaries of your home and prevent disputes with neighbors, as well as reveal any underground utilities that may be present.

Professional contractors have years of experience in the industry and have the expertise to provide recommendations that will meet your unique needs. They also have the proper licensing and insurance to work on your property. This protects you from any liability should an accident occur on the job, which is a risk that you assume when working with unlicensed or inexperienced contractors.

When choosing a fence company, it is important to ask how many years they have been in business and what types of fencing they have installed on previous projects. Choosing an experienced contractor will minimize the time needed to complete your project and ensure that all specifications are met.

A quality fence can make your property more secure and increase your privacy, and a durable, high-quality fence is a good investment that will last for decades. Selecting the best materials and working with an experienced fence company will ensure that your fence is a lasting, valuable asset for your home or business. To learn more about how you can improve your property with a new fence, contact us today.

Handyman Services

Handymen handle a wide range of carpentry projects, from mounting shelves that maximize storage to building custom cabinets that align with client design preferences. They also are skilled in repairing and replacing electrical issues, including light fixtures and outlets.

The right tools help handymen do their jobs efficiently. Start with basic hand tools like a reliable hammer and screwdriver set, then add power tools as needed. Visit our Website to learn more.

Handymen can provide a variety of plumbing services, including repairs and installation of fixtures. They also offer regular maintenance checks to prevent water leaks and ensure that drains function properly. They are adept at unclogging drains and can replace worn washers and faucets to keep your kitchen and bathroom running smoothly. They are also skilled in installing new bathtubs, showerheads, and sinks. Moreover, they can install and connect garbage disposal units to ensure proper water flow.

While a handyman’s diverse skillset means that they can tackle many home improvement projects, it’s important to understand their legal limitations. Specialized licenses are required for major structural modifications, such as foundation repairs and roof replacements. Hiring professionals with these credentials ensures compliance with building codes and safeguards the integrity of your home.

Homeowners often hire handymen for small repairs, such as painting touchups and carpentry work. However, if you need to hire a professional for a more substantial project, it’s a good idea to request quotes from several local handymen. This will help you get a better understanding of the prevailing rates in your area, and enable you to budget accordingly.

Lastly, it’s crucial to hire professionals who are licensed, certified, and insured. This will not only protect you from potential fraud but will also give you peace of mind knowing that your project is in competent hands. Moreover, it’s also essential to choose a contractor with experience in the specific task you need completed.

A reliable and reputable handyman can be an invaluable asset to any homeowner, providing expertise, convenience, and cost-efficiency. Finding the right professional requires careful research and referrals from friends, family, and neighbors. Personal recommendations are a great place to start and can lead to quality professionals with extensive experience and a commitment to customer satisfaction. Once you find a professional, it’s important to set clear expectations and pay close attention to the work being performed. Ask about warranties and guarantees, and consider milestone payments tied to the completion of specific tasks. This will help you stay within your budget and avoid costly surprises down the road.

Carpentry

Handymen are often referred to as “jacks of all trades” because they are well-versed in a wide variety of home repair and improvement projects. Unlike a general contractor, who requires extensive training and licensing to perform work on larger scales, handymen are often self-taught and able to address many issues quickly and efficiently.

One of the most common tasks that handymen take on is paint and staining. This includes both interior and exterior applications, including walls, cabinets, furniture, decks, and doors. Similarly, handymen may apply new caulking in bathrooms and kitchens as needed.

Other woodworking-related services handymen provide include installing or repairing window and door trim, baseboards, and crown molding. They may also build custom bookshelves and other interior storage solutions for clients. When it comes to outside, they can sand, refinish, and refinish furniture, as well as paint or stain fences and gates.

Some handymen are also able to install or replace window blinds and curtains, as well as replace doorknobs and handles. This is a particularly common request from elderly property owners who want to make their homes more comfortable and accessible. Handymen can also help with stairlifts and other accessibility upgrades.

Another important service handymen often provide is gutter cleaning and repair. They can clear clogs, fix leaky gutters, and make sure water drains away from the house correctly to prevent flooding and structural damage.

Handymen can even assist with small landscaping jobs, such as planting flowers and shrubs or raking leaves and debris. This helps homeowners save time and money by eliminating the need to hire multiple professionals for these types of projects. In addition, it ensures that the job is done right and to your satisfaction. It’s important for handymen to carry the proper insurance coverage and bonding requirements, such as general liability, workers’ compensation, and commercial auto. This protects their customers’ assets and finances in the event of an accident or injury on the jobsite. It also shows potential customers that they are reputable and professional. Having this type of insurance helps to foster trust and confidence between the homeowner and handyman.

Electrical

If you want to install new light fixtures or an appliance, your local handyman will be able to help. They can also repair existing electrical outlets and switches. Some states have laws requiring a license to perform electrical work. If you hire a licensed electrician to perform repairs, you will be more likely to get a warranty on the work.

Most handymen do not have an electrical license. However, they can perform minor electrical services like rewiring and installing ceiling fans. They can also replace fuses, test and replace smoke and carbon monoxide detectors, and install home security equipment.

Flickering lights or a dead outlet can be very frustrating. But don’t attempt to fix these problems on your own, because you could seriously injure yourself or damage your property. Moreover, doing this kind of work yourself may lead to costly electrical repairs down the road.

Many home improvement companies have a handyman service that can handle basic electrical repairs and installations. Some handymen have a specialty, such as plumbing or roofing, but most can do a wide range of projects. If the project requires a special license or permit, you should ask your handyman to check with your city or town hall.

There are several common problems that can be caused by improper or inexperienced electrical work. For example, a home fire can be caused by wiring that is too hot or too loose. These problems can be difficult to notice, because the wiring is tucked inside your walls. In addition, insurance companies will often deny claims if the electrical work was performed by a non-licensed handyman.

The best way to prevent these electrical problems is to call a professional electrician. Whether you are looking for a simple light switch installation or a full house rewiring, an expert electrician will be able to provide the quality and expertise you expect. They can also help you upgrade to smart home devices and wiring for things like voice-activated lighting, smart thermostats, or video doorbells.

Painting

A fresh coat of paint breathes life into your living spaces, transforming them into a vibrant oasis. Handymen apply both interior and exterior paint, stains, and finishes to walls, trim, wood furniture, doors, cabinets, and more. They also do extensive prep work, including filling in holes and sanding uneven surfaces, for a flawless finish. Handymen also consult with clients on color selection and high-durability coatings to meet specific project needs.

The scope and complexity of your painting project determines overall cost. For example, if your walls need extensive repairs and preparation before painting, this increases labor costs. In addition, choosing a high-quality paint with a longer lifespan can reduce future touch-up costs. To help keep your costs low, consider scheduling your project during a handyman’s off-peak season or avoiding custom designs that require intricate stenciling or faux finishes.

Hiring a professional painting company instead of a handyman offers several benefits, including specialized knowledge and experience, premium paints and materials, and expert advice on color and finish choices. The additional investment is worth it if you’re planning to paint multiple rooms or the entire exterior of your home.

When considering hiring a professional painting contractor versus a handyman, consider the scope and complexity of your project and your budget. A painting company will provide a detailed quote for the job, ensuring transparency throughout the process.

A well-maintained gutter system is essential to protect your home from water damage. Handymen often perform gutter cleaning and repair services, ensuring that rainwater flows away from your home, rather than towards it. They also clean out drains and downspouts, preventing blockages that can lead to costly water-related damages. In some cases, a handyman may also be capable of performing a more extensive gutter replacement or installation job. This is particularly true if the original gutters are made of aluminum, which requires special tools to properly remove and replace. In these instances, a skilled professional can often complete the work safely and efficiently.

Rodents and Rodent Removal

Rodents can spread diseases through bite wounds and contaminate food, water, and even air with germs from rodent waste. They also damage property with their gnawing and chewing.

Look for signs of rodents around your home, including droppings, gnaw marks, and nesting materials. Keep your yard tidy and remove dense ground cover to reduce shelter for rodents. Store food in sealed containers, and use natural repellents like peppermint oil and mothballs to discourage rodents from entering your home. Click the https://www.rodentretreattexas.com/ to learn more.

Rodents enter homes through small gaps and cracks where they can slip in undetected. It’s important to be able to recognize these entry points, and it is equally vital to seal them up to prevent future infestations.

Mice can squeeze through openings as small as a quarter-inch, while rats need only a tenth of an inch to gain access. Whether they’re sneaking into the attic through open vents or making their way into your crawl space through unscreened drain pipes, rodents can easily cause serious structural damage and spread dangerous diseases.

Knowing the habits of common rodents, such as mice and rats, can help you better identify potential entry points. These animals are driven by the need for food, water and shelter. When these basic needs are met, they look for quiet, undisturbed places to nest, which often include attics and wall cavities. Rodents also reproduce quickly, so the presence of even a single rodent can quickly lead to an infestation.

Rodents can chew through any type of material, including drywall and wires, in their quest for food and shelter. This can pose a significant safety and health risk for residents, as the exposed cables can be a fire hazard and cause electrical problems. In addition, the holes created by rodents are an ideal place for bacteria and fungi to grow.

If you notice any of the signs that rodents are gaining access to your home, take immediate action. Store food in airtight containers, clean up crumbs and spills promptly, and use garbage bins with tight-fitting lids. Remove any pooled or standing water inside and outside your home, fix leaky plumbing, and turn off outdoor faucets at night.

A professional rodent control service can identify and seal any entry points into your home, preventing the return of these pests. They will check for areas where rodents can enter through walls, roofs, and vents, including the eaves, and close them with durable materials like steel wool or caulk. They will also check for gaps around exterior doors and windows, and ensure that door sweeps are properly installed to keep out rodents.

Remove Potential Food Sources

Rodents enter living or working environments for two things: food and a warm place to nest. As such, removing the food supply and the places where rodents can hide goes a long way toward reducing an infestation. Identifying the type of rodent you have may help determine the best method for removal, as different species require different methods.

Look for signs of mice and rats around your home or business, including droppings, rub marks and gnaw holes. Mice can fit through openings the size of a dime, while rats are capable of chewing through drywall and other materials. Inspecting the exterior of your property for these entry points is just as important as checking inside. Keeping doors and windows tight, sealing cracks and gaps in walls and preventing shrubbery from touching buildings can all help keep rodents out.

Mice and rats contaminate food with their urine, saliva and fur as they raid storage areas and kitchens, which can pose health risks to humans. Infestations also threaten the reputation of restaurants, grocery stores and other businesses.

A professional pest control company can help you reclaim your space and prevent future infestations by assessing your home or business, identifying entry points and eliminating rodent food sources. They can also provide tips for storing food properly, managing waste and limiting moisture in your home or business.

If you suspect a rodent problem, it’s important to act quickly to limit damage and reduce the risk of disease. Mice and rats carry numerous diseases, including Hantavirus, leptospirosis and salmonellosis. They can also cause structural damage and lead to fires and electrical outages. Keep rodents out by ensuring all garbage is in tightly-sealed containers, storing dry foods in sealed containers and limiting access to compost piles and leafy debris. Using natural repellents such as mothballs, peppermint oil and citrus essential oils can also help drive away rodents. However, these measures should be used in conjunction with sealing holes, removing food and removing rodent nesting sites to fully eliminate an infestation. Taking the time to perform these steps will not only help you save money on pest control, it will also improve the safety and comfort of your living or working environment.

Eliminate Nesting Sites

Rodents like to nest in dark, hidden places where they can find food and shelter. Rodents are more likely to occupy these areas in the winter, when it gets colder and they can seek warmth inside homes. The most common places to find rodent nests include cluttered storage spaces, garages and sheds, basements and closets, and behind appliances. You may also notice signs of mouse infestations such as droppings, gnaw marks and musty odors in the home. A dog or cat sniffing around an area may also be an indication that mice are living there.

Mouse nests are typically smaller than rat nests and have a rounded appearance. They are made of shredded paper, fabric and other soft materials. They can be shaped to fit into a tight space, and they are often surrounded by bits of string or twine for support. Mouse droppings are usually smaller and have a more seed-like consistency than rat droppings.

Rats tend to build larger, globular nests, and their droppings are more solid than mouse droppings. They are a bit harder to spot than mice, because they often nest in dense vegetation or underground burrows. You may be able to detect their presence in a garden or yard, however, because they leave gnaw marks on plants and eat seeds from them.

You might also see gnaw marks on furniture and in drawers, cupboards, or cabinets. Rats will chew through wires and other items in their search for nesting materials and food, so they can damage your property and cause fire hazards.

If you discover a rodent nest, don’t disturb it. It’s important to leave it alone because rat droppings can contain bacteria and parasites that are hazardous to your health, and touching a rat nest can lead to a painful bite.

The best way to prevent mice and rat infestations is by eliminating their preferred hiding spots and reducing their access to food and water sources. You can do this by sealing gaps and cracks around entry doors, removing leaf piles and other debris from your yard, keeping garbage in sealed containers, and turning compost piles regularly. Other prevention strategies include checking for gnaw marks on food packaging, noticing musty odors in confined spaces, and watching out for signs of mouse or rat activity such as droppings and gnaw marks on furniture or walls.

Schedule a Inspection

Rodents are opportunistic creatures that enter homes and commercial buildings in search of food, shelter, water, and a place to reproduce. Inspecting your home or business for potential entry points and signs of rodent activity is a critical first step to keeping them at bay. Sealing gaps and cracks with steel wool or caulk helps keep them out. Cleaning up food and waste regularly and addressing drainage issues on your property can also help. Keep garbage bins closed and properly sealed, and use deterrent sprays that contain strong fragrances like peppermint oil to ward off rodents.

A professional inspection can help pinpoint the root causes of your rodent problem and prevent them from returning. An experienced pest control technician will look for access points through walls, floors, and ceilings, and will examine outdoor areas where rodents might be entering, such as woodpiles, debris piles, bird feeders, waterways, and garages and crawl spaces. They will check for rodent droppings, urine trails, and gnawing marks. In addition, they will look for smudges from the rodents’ oily fur, and they will examine the ground for a dark substance called sebum. Sebum accumulates in places that rodents frequent and can reveal pathways they use.

An inspection will also identify the type of rodent infesting your space. There are different species of rats, mice, voles, and gophers, and each requires a different treatment. The pest control technician can then develop a plan to effectively eliminate them all.

Another goal of the inspection is to evaluate the extent of damage caused by the rodents. This can help determine the length of an infestation and the severity of any ongoing health risks.

Rodents can cause extensive damage to homes and businesses, and they are a serious threat to human safety. Insecticides are often ineffective in eliminating them, and they can re-infest your premises. Rodent exclusion services are a safer and more effective way to resolve a rodent problem. By depriving rodents of their food, water, shelter, and ways to get around, you can significantly reduce their populations. Hiring a rodent removal service that prioritizes humane practices and preventive maintenance can save you money on repairs, medical bills, and lost revenue.

How to Properly Repair Your Concrete

Concrete surfaces are vulnerable to weathering, chemicals and heavy traffic. Addressing damage promptly helps prevent it from getting worse, which will be more costly and time-consuming to repair down the road.

Concrete Repair

Different types of concrete damage require different products and techniques to repair. Using chloride ion testing and other tests will provide valuable insights about the severity of deterioration that will inform what product to use for a successful repair. Contact Concrete Repair Bismarck for professional help.

Concrete is a significant investment and the unsung hero of your home or commercial property’s curb appeal. Maintaining it properly protects its appearance and minimizes the need for costly replacement. It is vital to address any deterioration as soon as it is discovered, ensuring that the repaired surface will be safe and functional for many years.

Whether you are preparing the surface for repair or looking to add decorative elements, the right tools make the difference. From power saws to a concrete mixer, it’s important that you choose the correct tool for the job to ensure your concrete repairs are safe, effective, and durable.

It is also crucial to wear the proper safety equipment when working on concrete surfaces, as concrete dust can irritate your skin and eyes and be harmful if inhaled. Wearing a face mask, protective gloves, and steel-toed boots is recommended to prevent any injury during the process.

When repairing concrete, the first step is to clean the area to be worked on. Remove any dirt or debris with a broom, vacuum cleaner, or pressure washer to prepare the surface for repair.

If the concrete is damaged in a small section, you can use a grinder to remove any loose or damaged sections of the concrete and prepare the surface for repair. There are a variety of options available for grinding, from large, self-powered walk-behind machines to smaller hand-held units that can be used in more confined areas.

For cracks in the concrete, you can use a chisel to widen the crack slightly, creating a V-shaped groove that is wider at the top and narrower at the bottom. This helps the patching material to bond better with the concrete, reducing the chances of future failures.

Once you have removed any loose or damaged sections of the concrete, you can prepare the area for repair with a sand, cement-based, or polymer-modified patching material. Onfloor offers a range of high-quality patching materials, so you can select the right one to suit your needs. Ensure the product is mixed according to the manufacturer’s instructions to get a consistent mixture. Then, smooth the patching material with a trowel and allow it to cure.

Preparation

Concrete is a hardy material, but it’s not immune to the wear and tear of use and exposure to the elements. When damage occurs, it may be time to bring in some reinforcement and make a concrete repair. A professional engineer experienced in concrete construction should be consulted for projects that require major structural repairs.

The first step in making a concrete repair involves properly cleaning and preparing the surface. This process removes substances that can interfere with the bond between new and existing concrete, including paint, other coatings, oil and dirt, efflorescence, rust and mildew. A shotblaster or grinder can be used to remove these and other contaminates. The surface should also be prepared to ensure the proper concrete surface profile (CSP). The CSP rating, established by the International Concrete Repair Institute, refers to a standard for evaluating a concrete surface’s roughness and porosity, which influences how well certain topical materials will adhere to or penetrate the concrete.

If the concrete is contaminated by chemicals that weaken it or create a barrier to adhesion, these should be removed before starting a repair. Likewise, heavy oils should be degreased prior to working with concrete, as repeated applications of an oil-dissolving chemical are usually required.

In many cases, a full replacement of the damaged concrete is not necessary. Instead, the existing concrete can be repaired using various products and techniques. Some examples include concrete patching, hydraulic cement and mortars, polymer cements, and epoxy injection and caulking.

If cracks are present, it’s important to identify their type and severity. Plastic-shrinkage cracks appear in the early stages of curing and are usually short in length. These types of cracks are most likely caused by the concrete settling too quickly relative to the surrounding concrete. Hairline cracks, on the other hand, develop at mid-depth and are more common than plastic-shrinkage cracks. These cracks are more difficult to repair and often widen as they mature.

When patching a concrete surface, it’s a good idea to apply a bond enhancing product like SpecChem’s Strong Bond or SpecWeld. These products act as the glue that helps the patch and the old concrete adhere to each other, ensuring the repair is long-lasting.

Repair Materials

Concrete repair requires high-quality products working together in tandem. The success of the entire project depends on meticulous assessment, precise execution, and proper curing processes. If the proper concrete repair materials are used, then a resurfaced and restored structure will last for decades to come.

Portland cement mortar or grout is the most common repair material for concrete structures. It is easy to use and relatively inexpensive. It also has good compatibility with the existing concrete structure and provides an excellent bond with the rebar. In addition, Portland cement contains silica and alumina which is essential for the corrosion protection of reinforced concrete from chloride attack.

To improve the mechanical bond between the existing concrete and the repair material, the surface must be roughened. This is accomplished by shot blasting or acid etching, and it ensures that the repair material has an adequate surface area to adhere to. It also increases the durability of the concrete repair.

The preparation of the concrete repair is very important. It is necessary to achieve a Saturated Surface Dry (SSD) condition before the application of any product. This means that the concrete is damp to the touch, but it does not have standing water. If the concrete is too moist, it can absorb too much of the repair material and lead to improper curing and weak adhesion between the old and new surfaces.

A concrete repair material with low drying shrinkage is desirable to prevent failure of the bond between the repaired surface and the existing concrete structure. In addition, a repair material with low permeability is recommended to prevent the penetration of aggressive substances, such as carbon dioxide, water, oxygen and industrial gases and vapours, into the reinforced structure.

It is also crucial to choose a repair material with the right water/cement ratio, since it affects the strength and workability of the product. The water/cement ratio should be similar to that of the existing concrete in order to avoid a difference in modulus of elasticity between the two materials.

It is also a good idea to use a primer or bonding agent to enhance the adhesion between the new concrete and the existing concrete. This can be done by applying a product like Strong Bond or SpecWeld. It is important to apply the bonding agent while it is still tacky so that it does not dry completely before the repair material is added.

Curing

The final step in any concrete repair project is to properly cure the surface. Curing is a crucial step that allows the concrete to solidify and create a strong and long-lasting repair. To ensure that the curing process is complete, it is important to follow the manufacturer’s recommendations for time and temperature. Depending on the product, the concrete may need to be left for several days before being allowed to be driven over or otherwise used.

Before starting any repairs, make sure that you have the proper tools and safety gear to work safely. Wearing protective gloves and a mask will prevent inhalation of concrete dust, which can cause alkaline burns on the skin and eyes. Also, ensuring that the area is well-ventilated and that all workers are wearing protective gear will help to keep the workspace clean and safe.

Thoroughly cleaning the surface for concrete repair is another crucial preparation step. It is essential to remove any contaminants such as dirt, debris, oil, or existing paint from the surface, as these will interfere with the adhesion of the concrete patching materials. Some surfaces can be cleaned with physical methods such as sandblasting or grinding, while others may need to be pressure washed. The surface must be completely dry prior to beginning any repair work, as moisture can weaken the final results and cause a premature failure of the new concrete.

When repairing cracks in concrete, it is often necessary to use an epoxy injection system. This process involves drilling holes on both sides of a crack and then inserting oversized staple-looking metal units into the hole to stop the crack from expanding. Generally, this method is only used when it makes sense to repair the crack rather than replace the entire slab.

Whether you need to repair concrete steps, floors or slabs, there are a variety of concrete repair products on the market. By carefully choosing the right tools and preparing the surface correctly, you can achieve a professional-quality finish and extend the life of your concrete. Be sure to take proper safety precautions, allocate adequate time and budget, and consider professional help where appropriate.

Tree Stump Removal – How to Remove a Tree Stump

A stump can be a significant eyesore in your yard. Various removal methods exist, from grinding to chemical treatment to manual digging.

If you prefer a hands-on approach, consider using the manual method for removal. First, dig around the stump and expose its roots. Then, use a mattock or pickaxe to chop through the roots. Contact Tree Stump Removal San Diego now!

Chemical Method

Tree stumps are unsightly and obstructive, and they can attract pests, encourage the growth of invasive weeds, and cause damage to other trees and shrubs sharing the same yard space. Not only that, but they can also rot and cause soil instability. Ultimately, they can be detrimental to your home’s value and pose a safety risk for your children and pets. That’s why removing any remaining tree stump is important as soon as possible. There are several different ways to do this, and some are more labor-intensive than others. However, there is a less strenuous method that can be done by using chemical products.

While there are a few different kinds of chemical stump removers on the market, most work by speeding up wood decay. They can be applied to holes drilled into the stump, or mixed with water and applied directly onto the surface of the stump. This process can take some time, as the chemicals need to penetrate the stump and get to work rotting away the remains. However, there are ways to speed up this process, such as by drilling large vertical holes and filling them with potassium nitrate or rock salt. This will give the fungi more to work with, and can help it break down the stump faster.

It is important to note that using chemicals in this way can be very dangerous, so it’s best to only do this if you are familiar with the proper safety procedures. Always follow the instructions on the product’s label, and make sure you use safety glasses or goggles to protect your eyes from wood particles. Also, be sure to wear sturdy work gloves and steel-toed boots.

This is a good option for those who want to avoid backbreaking labour, but still need to remove a tree stump. While it may not be as quick as digging out the stump and roots by hand, it is a much safer option for those who are hesitant to use power equipment. It is also ideal for those who need to remove a large stump quickly, as it can be used in conjunction with other methods, such as burning or manual removal.

Manual Method

When a stump needs to be removed without using a power tool, the manual method can be effective. It involves digging a trench around the stump’s base, exposing its roots and cutting them off with a mattock (a combination tool with a pickaxe on one end and a hoe on the other). Loosening dirt with a shovel or a mattock can be strenuous work, but a hose can help wash away loose dirt and expose more of the root system. After severing the main roots, you can pull the stump out by hand or with a vehicle attached to the end of the mattock chain.

The process of removing a tree stump with this technique is lengthy and time-consuming, but it can be effective when the conditions are right. The natural decomposition of a tree stump over time can be accelerated with the addition of high-nitrogen fertilizer, which will boost the activity of the microorganisms responsible for breaking down the wood and enriching soil.

After a few weeks, the stump will be ready to be pulled out with a vehicle, assuming it is still in good condition. A vehicle equipped with a strong tow chain is ideal for this job, and you will also need a winch or other pulling mechanism to bring the stump free from the ground. A vehicle like this isn’t always a good choice for large stumps, so it may be necessary to hire professional stump removal services instead.

When the stump has been cut, a heavy-duty tarp should be placed over it to keep rain from diluting the chemical solution and slowing down the process. A few more weeks of treatment will result in a soft, spongy stump that can be easily pulled out with the vehicle or another tool. If you’re unable to remove the stump, it’s important to refill in the hole left behind and cover the area with mulch to prevent further decay and encourage future plant growth. This will keep the stump from competing for water and nutrients with new plants, reducing the risk of disease and pests.

Burning Method

Burning is a cheap method of stump removal, but it’s not the safest or fastest. It can take up to a day to remove a large stump through burning, and you’ll have to be on site the entire time. It’s a good idea to bring a hose and fire extinguisher to control any unexpected flare-ups, and you should prepare by scheduling a hefty block of time in which to carry out the process.

If you choose to use this method, you must ensure that it’s legal in your area, as open burning is not usually allowed in urban areas. If you don’t, you may be liable for fines and environmental damage. To start, dig around the stump and expose as much of it as possible. This will make it easier to get rid of. If it’s particularly fresh, you can try to speed up the rotting process by drilling holes into the stump and filling them with nitrogen-rich fertilizer. This stimulates microbial activity and will eat away at the stump.

Once the stump is exposed, you can start to build up the fire. Put kindling on and around the stump and carefully add wood as needed to sustain it. Be careful not to leave the fire unattended, and monitor it at all times from a distance.

You can also use a powdered fertilizer known as salt peta, which is poured into the holes drilled into the stump. This dissolves the charcoal and makes it more brittle, making it easier to chip away.

If you don’t want to wait for the stump to rot, you can also hire professional stump grinding services. They can grind the stump and cut it into smaller pieces that you can remove from your property. You should still be aware of any underground utility lines and other important issues, such as the risk of environmental damage or damage to nearby plants. Before hiring professionals, check with your local utility company to locate any lines that may be in the ground or near the stump. Then, clear the area of any fences, sprinkler systems and garden ornaments that could obstruct or be damaged during the process.

Chainsaw Method

Using a chainsaw to remove a stump is an excellent option for those who want to avoid chemicals, but the process can be challenging and dangerous. Unless you have a lot of experience with a chainsaw, it’s best to hire a professional to do the job for you. Before you start, make sure that the area around the stump is clear and free of debris. You should also wear protective gear, including a face mask, safety goggles, and steel-toed boots.

The first step is to use the chainsaw to cut as much of the stump above ground level as possible. Once this is done, move back and take a close look at the stump to make sure that you’ve got all of the roots. Depending on the size of the stump, you may need to dig up large sections of the root system in order to fully remove it from the ground.

After the root system has been removed, it’s time to use the chainsaw to cut the remainder of the stump down. This is a long and tedious task, so be prepared to work for a few hours. To help speed up the cutting process, you can use a chainsaw attachment called a sawzall. This tool has a blade that is less likely to be damaged by dirt than a regular chainsaw.

Once the stump is cut down, you can begin to remove it by hand. This is a very tedious process and requires a great deal of digging and cutting. Depending on the size of the stump, it may take several weeks or even months before it’s completely removed from the ground.

One method that can speed up the removal of a tree stump is to use a chemical solution. There are multiple types of chemical solutions on the market that can be poured down holes drilled in the stump. These chemicals speed up the natural decay process and break down the remaining stump fibers and roots more quickly. If you choose to use this method, it’s important to choose a day with no wind or rain in order to reduce the risk of the solution blowing away or spreading to other parts of your yard.

Driveway Repair Tips

If your driveway has cracks and other surface damage, resurfacing may be a good choice. Depressions and tire ruts also reveal asphalt that needs repair. They allow water to soak in and cause further damage.

Driveway Repair

The biggest consideration is whether your driveway has widespread damage that requires a replacement. Contact Driveway Repair Charleston SC for professional help.

Cracks in your driveway are a common problem and although they don’t usually cause damage it’s still unsightly. Cracks can also indicate structural problems that require a professional assessment and more extensive repair work. In many cases, the best solution for repairing cracks is to use concrete repair products that are specifically designed to bond and seal concrete surfaces, helping to restore the integrity of your driveway and prevent further damage.

For hairline cracks, which are less than 12 inch wide, you can use a concrete patching compound to fill the cracks and smooth out the surface. For this, you’ll need to prepare the area by lightly dampening the concrete and using a putty knife or trowel to work the crack filler into the cracked areas. The best results are achieved when you apply the crack filler in layers rather than filling the entire crack at once. Once the crack filler has set, you can seal it with a high quality concrete or asphalt sealant.

A good concrete sealant has the ability to expand and contract slightly with temperature changes, which helps to prevent pulling away from the edges of the cracks. It’s important to read the label of any concrete repair product you choose, and be sure that it’s suitable for your specific needs.

For cracks wider than 12 inch, you’ll need to use a more extensive repair method. You may need to use a hammer and chisel to widen the cracks so that the concrete repair compound can be properly applied. Then, you’ll need to prep the cracks again by removing any loose bits of debris with a broom and thoroughly brushing the cracks. It’s essential to ensure that the cracks are completely clean prior to applying a repair product, to avoid having the new sealant pull away from the existing cracks.

Structural cracks that appear in the center of your driveway are a serious issue and need to be addressed as soon as possible. These cracks are caused by shifting of the ground underneath your driveway and can lead to severe damage if not treated immediately. If you have large, structural cracks in your driveway, contact a concrete service to assess the problem and provide an appropriate solution.

Potholes

Potholes are a major headache for driveway owners. They damage cars and are a safety hazard for pedestrians. They also make the surface of a driveway look unkempt and unprofessional. In addition, they’re costly. It’s important to address them early before they grow and cause more damage.

Like cracks, potholes are caused by water build-up in a small area of the asphalt. This can happen during the winter after snow melts or rain. Asphalt pavement is especially susceptible to this deterioration, but even dirt or gravel driveways can experience the same issue.

Almost all potholes develop because of poor drainage. This is a problem in both dirt and asphalt driveways, but it is much more of an issue in gravel driveways because there is less of a solid base to support the pavement. This is why a gravel driveway should be regularly graded to redistribute the existing material and keep water from pooling in one spot.

To repair a pothole, start by cleaning out the old material and removing any debris. Heating the hole is important because it removes any excess moisture and softens the existing material. This will allow the new material to bond with the existing asphalt. Once the pothole is cleaned, add the new asphalt patch and tamp it down. If you don’t have a tamper, a lawn roller or car will work fine. After tamping, rake the patched area to blend it with the rest of the driveway surface.

For best results, it’s a good idea to use bagged asphalt patch for driveway pothole repairs. This will usually have instructions on the label that will let you know how to prepare and apply it correctly. Most of the time, you will need to heat the patch before applying it to the pothole. This will help to ensure that it bonds with the existing asphalt and doesn’t fall off later.

If you have a gravel driveway, it’s a good idea to repair any potholes in the spring before the winter weather hits. This will prevent them from getting bigger and damaging your vehicle and the surrounding driveway. It’s also a good idea to perform regular maintenance on your driveway to reduce the risk of potholes and cracks. Regular grading, along with proper drainage and a crown, will minimize water erosion and maintain the integrity of your asphalt pavement.

Crack Filler

Crack filling is a quick, cost-effective way to treat asphalt surface damage. It stops the flow of water through cracks, preventing further deterioration and the formation of potholes. The process involves cleaning the crack, applying a premium crack filler, and smoothing it to blend in with the existing driveway surface. The process can be performed by the homeowner with a caulking gun and store-bought sealants for small cracks or by professionals with industrial-grade materials and equipment.

Asphalt crack fillers are available in a wide range of textures and strengths, making them suitable for various types of asphalt surfaces and weather conditions. Hot-pour crack fillers, which are heated and poured into cracked areas, are ideal for high-traffic pavements. These materials are durable, flexible and able to withstand the movement of heavy vehicles.

Cold-applied crack fillers, on the other hand, are typically applied to parking lots and residential driveways. These materials are less durable than their asphalt counterparts, but they offer a more economical and quicker repair solution.

When cracks in asphalt are left untreated, they can cause serious problems, such as erosion and failure of the base materials. Using crack filler prevents the entrance of rain and moisture into the cracked area, slowing down the rate of deterioration and helping to maintain the longevity of the asphalt.

In addition to preserving the asphalt, crack filling also improves the overall appearance of the driveway. It makes the surface of the driveway look newer and more attractive, which can make a positive impression on customers and visitors.

The process of filling and sealing cracks in a driveway is fairly simple, but there are a few key steps that must be taken to ensure success. First, the crack must be cleaned thoroughly to remove dirt and debris. This step is important because it ensures that the crack filler adheres properly to the damaged area. Next, the crack filler must be carefully introduced into the cracked area, using a caulking gun or crack-filling machine for large areas and a putty knife for smaller areas. Finally, the filled crack must be smoothed and allowed to cure for a minimum of 24 hours before driving over the area.

Sealer

Sealing a driveway is one of the best ways to protect it from damage and prolong its lifespan. It acts as a barrier against water, which seeps into and destroys asphalt from underneath. This is especially important in areas that experience frequent freeze and thaw cycles, as well as shifts and settling of the ground.

Unlike crack filling, which is most cost-effective when applied to small cracks that have not spread widely, seal coating is the most effective treatment for protecting the entire surface of an asphalt driveway. It’s also more economical than resurfacing or replacing the entire driveway.

For the best results, always apply a new sealer to a clean driveway. Remove any weeds or debris and pressure wash the surface to remove dirt and grime. Before applying a driveway sealant, read the manufacturer’s instructions for proper application. Spraying or rolling is usually recommended for even coverage, and a thin coat is best for maximum durability.

Concrete driveways require regular maintenance and resealing to prevent damage and extend their life. This includes cleaning the surface with a brush or blower and washing it with a degreaser every few months to prevent oil or gas staining. It’s also a good idea to distribute the weight of parked cars and avoid driving on icy or snowy driveways, and to inspect your concrete for cracks or other damage annually.

Depending on the type of concrete you have, you can choose from several different types of sealers. Acrylics, epoxy, polyurethanes, and silanes are popular choices, all of which offer durability and weather protection. Penetrating sealers are made of silanes, silicones, or other resins that bond with the concrete to form a chemical barrier against contaminants like water and oil.

While it’s tempting to ignore any signs of damage to your driveway, ignoring problems will only lead to more costly repairs and possibly compromise the structural integrity of the entire structure. Repairing your driveway promptly not only saves money, it ensures the safety of your family and guests who use the area. If you need a repair done on your driveway, contact a professional to get the job done right.

Choosing the Right Siding for Your Home

Siding not only enhances a home’s curb appeal but also protects it from harsh weather and pests, increases its value and provides energy efficiency. Choosing the right siding is important to ensure it will perform well over time.

Engineered wood siding offers the classic, traditional look of natural wood with added elements that strengthen it, resist moisture and rot and reduce termite damage. It’s available in clapboards, trim and fascia/soffit panels. Visit Our Website to learn more.

Flashing is a barrier made from materials like aluminum, copper, or rubberized asphalt that prevents water infiltration around areas where roofs connect with walls. It channels moisture away from these junctions, preventing leaks and protecting siding from rot, mold, and long-term damage. Unlike roof flashing, which is visible, siding flashing is often hidden beneath the trim. Nonetheless, its proper installation is just as crucial to a building’s integrity and energy efficiency as any other component of the structure.

Leak protection is critical to the health of any building. Despite the prevalence of other moisture barriers, slow leaks through damaged or improperly installed wall flashing can quickly overcome them and permeate building materials, causing mildew and mold, wood rot, and saturating insulation. In addition, the dampness caused by leaks can also lead to changes in indoor humidity that can affect building occupant health and safety.

Insufficient or improperly installed flashing is a major contributor to water problems in walls, especially around windows and doors. While caulking can temporarily patch many leaks, the only true solution is to properly flash and seal these penetrations and joints in walls.

Most siding leaks are caused by inadequate flashing, so it is important to regularly check your home for signs of flashing damage, including sagging trim, loose or bubbling paint, and dark spots in the walls. When these signs occur, it is best to have them looked at by a professional as early detection can help prevent costly repairs in the future.

Furring Strips

Furring strips provide a sturdy surface for siding and other finishing materials to attach to. They also provide air space behind cladding, helping to prevent moisture damage within walls. They are especially important for Haddonfield homes upgrading to a rainscreen system.

Furrows, or grooves, in sheathing can create a surface for moisture to gather. The resulting condensation can cause wood rot, mold, and decay within walls. Furring strips eliminate this issue by creating a drainage plane that moisture can flow through and away from the structure.

Installing them at regular intervals will allow water to escape the walls faster, reducing the risk of moisture damage. It’s recommended that furring strips are installed every 16 inches along the wall. They should be placed vertically as well as horizontally to help create a good drainage plane.

There are several types of furring strips available for use on new construction and home renovation projects. Some are made from woods such as spruce or fir that are lightweight and easy to work with. Others are manufactured from materials such as high-density polyethylene (HDPE), a durable and weather resistant plastic that resists rot, mildew, warping, and insect infestation.

The type of furring strip you choose will depend on your project needs. For example, if you’re replacing vinyl siding, you may need to use HDPE instead of wood to protect the integrity of your sheathing. Other options include a cor-a-vent SV-3, which is an open weave entangled net that functions like a traditional furring strip but is much more effective in protecting vinyl from moisture damage.

Other than preventing moisture damage, furring strips can also make your new vinyl siding easier to install and maintain. For example, if you have large pipes running through your walls, you can use the furring strips to allow for their location without impacting the cladding’s installation.

Fascia

Fascia boards sit directly above a home’s roof overhang and connect to the soffit underneath. They protect the edges of your roof from water damage and prevent rot. They also provide a finished look and add to the overall curb appeal of your home. Like soffits, fascia boards come in a wide variety of materials. Wood is a popular choice, but requires regular maintenance to avoid rotting. Vinyl, aluminum, and fiber cement are more durable options that can withstand harsh weather conditions.

Aside from protecting the edges of your roof, a fascia board’s integrity is vital to preserving your home’s structure and preventing structural damage. It redirects rainwater away from vulnerable areas, keeping it from soaking into eaves and rafters. In doing so, it can prevent rot and moisture issues, as well as make your house more energy efficient.

While a damaged fascia may seem minor at first, it can worsen over time, especially if left unattended. In turn, this can lead to problems like rotting and insect infestations. The good news is, when soffits and fascia are replaced with high-quality materials, it can last for years to come without requiring frequent repairs or replacements.

To keep your soffit and fascia in tip-top shape, it’s important to perform routine maintenance and promptly address any problems you notice. When you’re ready to upgrade your siding, don’t forget to replace your soffit and fascia as well! Our experienced team at TruLog Siding can help you select the best soffit and fascia materials to suit your needs. Contact us today to schedule a free estimate in Barrie, ON. We offer flexible financing options to fit your budget!

Profile

The profile of your home’s exterior can be a major factor in its overall aesthetic. It can also have a significant impact on its durability, maintenance needs and cost-effectiveness. A variety of siding materials and profiles are available to suit nearly any architectural style or aesthetic preference, from a classic vinyl clapboard to a contemporary metal panel option. Many of these products have advanced features that make them durable, low-maintenance and resistant to weather conditions that can lead to moisture infiltration and rot.

Durability is a key factor that influences the longevity of siding. In regions that experience severe weather conditions, high winds and heavy rains, a durable material will ensure that your home’s exterior stays protected from damage. Most modern siding options, such as fiber cement and LP SmartSide products from James Hardie, are durable enough to withstand the elements. However, this doesn’t mean that damage won’t occur. In most cases, damaged siding will appear as chipped paint or small indents.

Other factors that influence the longevity of siding include its ability to resist rot and pests and its resistance to UV exposure. Most modern siding is made from durable materials that are able to withstand these conditions and protect your home from moisture infiltration and rot, as well as pest intrusion.

Aside from durability, the profile of your siding can have a significant impact on its appearance. Some options are designed to accentuate architectural details and create a more refined look, while others provide a rustic charm that can complement the character of your home. For example, board and batten siding offers a unique, rustic look that works well on farmhouse-style homes. Its vertical lines enhance the visual height of your home, making it look taller and more stately.

Soffit

Although soffit isn’t something most homeowners think of when assessing the state of their home’s exterior, it’s a crucial part of any roof overhang. Soffits protect a home from damage by providing adequate attic ventilation, keeping pests out, and keeping moisture out. Moreover, the panels create an attractive transition from the roof to the wall and contribute to cohesive curb appeal.

Soffit panels are typically installed on the underside of a roof’s overhang where they cover the bottom of the rafters. They allow for proper attic ventilation, which reduces the risk of moisture damage to rafters, and promotes comfortable temperatures in the living space below. Additionally, soffits prevent rot and mold by preventing water from seeping into the attic.

When it comes to soffit maintenance, regular upkeep is important to avoid moisture damage and pest intrusion. Moisture infiltration from a damaged soffit can cause wood siding to warp or bow. It can also lead to the formation of mold, which is a sign of underlying moisture damage. Moreover, soffits that are clogged with leaves and debris can hinder attic ventilation.

A soffit can be vented or non-vented depending on your home’s needs and available attic space. Vented soffits are ideal for homes with wider eaves that require ample attic space to be ventilated. In contrast, non-vented soffits are best for narrow eaves and smaller attic spaces. LP SmartSide’s soffit and fascia are available in 16 versatile ExpertFinish colors to complement the look of your home’s siding and other trim options. They can also be easily matched to your shingle color selection to provide a seamless, coordinated appearance. Contact us to learn more about our soffit and fascia installation and maintenance services.